

Maps are vital to understanding campaigns and battles. During the American Revolution, military planners often lamented the lack of good maps and went to great lengths to obtain geographic information. Officers with the proper training and tools could quickly produce sufficiently detailed renderings of the lay of the land, adding information as it became available.
Maps were also useful for communicating what had occurred, whether by drafting an original map or by adding notations to an existing map. After any major battle, senior officers sent after-action reports to their superiors, made more intelligible when accompanied by a good map. These battle maps are particularly valuable for historians; not only do they show the distribution, and sometimes the movements, of forces, they make it clear how the terrain influenced that distribution. Noticing which geographic features the mapmaker chose to render helps to understand which features were considered important. Inaccuracies in the map provide clues to the difference between what was perceived and what was actually true. Even crude sketches can provide valuable insights.
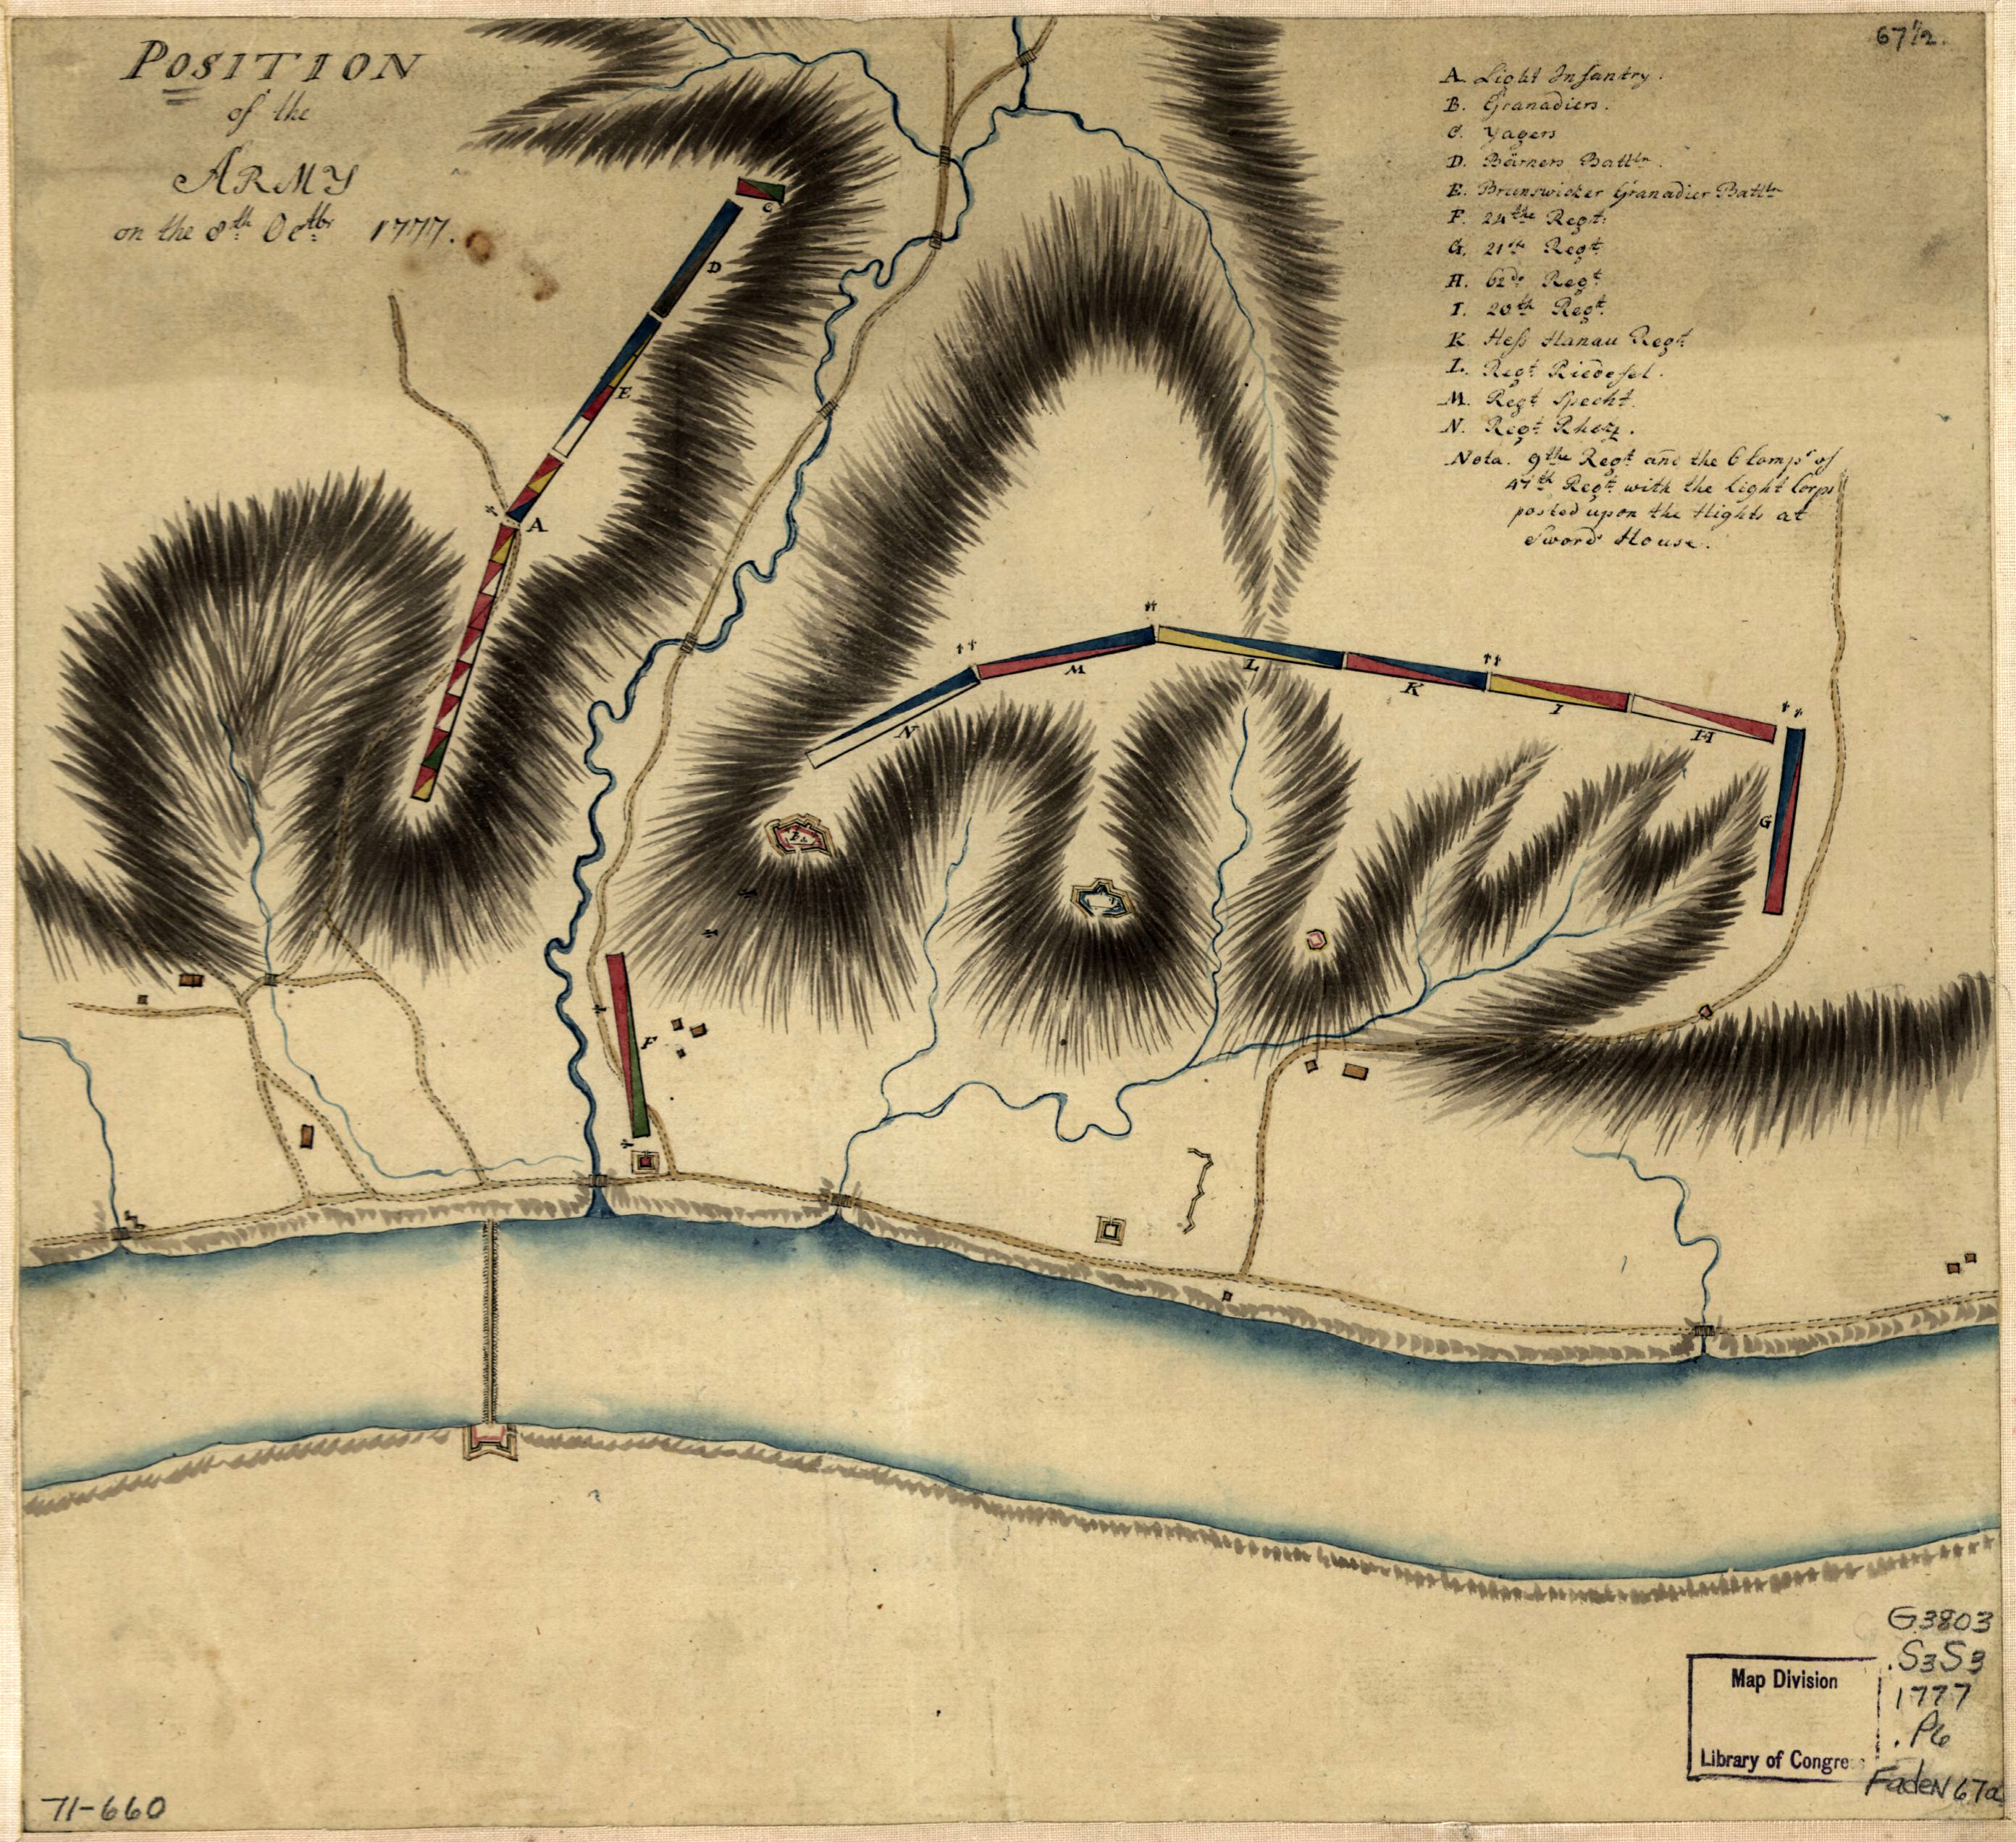
Some mapmakers included unexpected details. This map in the Library of Congress, showing the position of General John Burgoyne’s army at the Great Ravine the day after the famous battle of Bemis Heights on October 7, 1777, uses common cartographic devices to represent positions of regiments: rectangles divided by a diagonal line. Each regiment is shown by a rectangle, with letters that correspond to a legend in the upper right. But the rectangles are colored in different ways, some half-red and some half-blue. The other halves vary in color. The red corresponds to British regiments, and the blue to German regiments, the color of the coats worn by soldiers from each place. The other half of each rectangle is in the color of the lapels of each regiment’s coats; regiments could be distinguished by the colors of the lapels, cuffs and collars of their coats. The British 24th Regiment, designated by the letter F on the map, wore red coats with deep green lapels, and we see their rectangle is red and green; the German Regiment von Rhetz, which wore blue coats with white lapels, is depicted by a blue and white rectangle with the letter N. Knowing this color convention allows us to decipher the order of battle of the British light infantry battalion, denoted by the letter A in the upper left. Composed of light infantry companies detached from British regiments, the arrangement in which they deployed for battle is difficult to determine from documentary sources. But, comparing the colors on this map to known information about uniforms, we can see that the company from the 9th Regiment (yellow lapels) was on the right (facing to the left of the map), that of the 20th Regiment (also yellow) on the left, that of the 21st Regiment (blue) next on the right, that of the 24th Regiment (green) next on the left, and so forth for the 29th, 31st, 34th, 47th, 53rd and 62nd Regiments, working inwards from the flanks (the colorist left a few of them blank, or white, suggesting that he didn’t know which color to use). A small detail, but very useful for the study of military operations.

Recent Articles
American Achilles: Daniel Morgan’s Resignation and Return to Service
This Week on Dispatches: Jesse Wegman on James Wilson, the “Lost Founder”
Samuel Brady: A Future Legend Goes to War
Recent Comments
"The Lost Founder: James..."
Jesse, thank you for the dialogue, which provides a better understanding for...
"Samuel Brady: A Future..."
Thanks, Gene. Fold3 is a godsend. I really am tempted to dig...
"Samuel Brady: A Future..."
Eric, I like that you emphasized Samuel Brady's commitment to the Patriot...