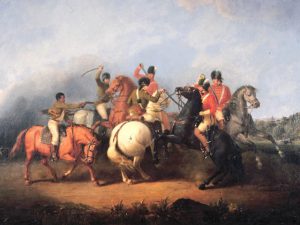
In the courtroom of the American Revolution, historical analysis – no matter how comprehensive or thorough – often results in competing opinions and conclusions. New facts, new narratives and new conclusions are constantly being presented, so historians do their best to argue their cases and appeal to a jury of peers.
While historical litigation may occasionally take place in the comments of Journal of the American Revolution, we thought we’d provide a main stage forum for a respectful written debate between regular contributors Wayne Lynch and Jim Piecuch on a key question about the Battle of Cowpens.
The debate process was simple. Lynch first used 600 words to present his opinion on the matter and shared it with Piecuch, who took 900 words to offer his counter perspective. Piecuch shared that with Lynch, who used 200 words for a rebuttal. The finished debate will hopefully give readers enough information to form their own opinions or further investigate the topic. So, without further ado, let’s get ready to rumble.
***
All good Patriots brag of giving Banastre Tarleton a good beating at the Cowpens with a combination of Morgan’s sly militia style and hard fighting from John Eager Howard and William Washington. However, from the British perspective the Cowpens was a battle that should have been easily won if not for mistakes or miscommunications on the battlefield. At the center of this long-standing controversy sits Lt. Colonel Tarleton and the question of just how he could have lost at the Cowpens.
Or to what extent does the responsibility of loss fall upon Tarleton?
Position 1: Wayne Lynch – Tarleton 100%
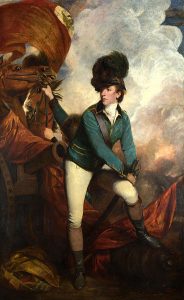
Yes, Tarleton definitely deserves blame for losing at Cowpens. He made several key mistakes which led directly to the defeat. In fact, a controversy started right after the battle and distressed young Tarleton so badly he threatened to resign unless Cornwallis provided a favorable opinion exonerating him of all blame for the defeat. Tarleton assigned the loss to his own Legion for refusing to charge when called on. Faced with the loss of his only cavalry commander who was badly needed for the North Carolina movement, Cornwallis joined Tarleton in blaming the defeat on “the total misbehavior of the troops”.[i]
One of the officers wounded at the battle, Lt. Roderick Mackenzie of the 71st Highlanders, took exception to Banastre’s claim and wrote a series of letters in response to Tarleton’s book about the Southern Campaigns. Mackenzie assigned several errors to Tarleton.[ii] First, he could have easily rested the troops from their early march while artillery softened up Morgan’s militia force without “risque of insult.” The delay would also give Tarleton an opportunity to consult with several more experienced officers available to him.[iii] Tarleton clearly could have used the advice. By the time of Cowpens, Patriot leaders were well acquainted with his tactic of striking fast and hard immediately on arrival at the battlefield. Tarleton had become predictable and the Patriots designed their defenses accordingly. Mackenzie felt that further consultation with the 71st’s commander, Major Archibald M’Arthur may have resulted in the desired changes. Additionally, the whole battle progressed too quickly because Tarleton directed the line to advance before it was properly formed, and before the reserve had taken position.[iv]
Perhaps Tarleton’s biggest mistakes came from mishandling his cavalry. The young commander split his cavalry into three parts placing about 50 dragoons under Captain Ogilvie on his left flank and another 50 from the 17th Regiment on his right flank while holding his remaining 200 men from the Legion cavalry in reserve. This wide division between the dragoons gave Morgan’s Patriot cavalry the opportunity to defeat each troop separately even though his total regiment contained less than 120 riders. At the beginning of the battle, Tarleton held an advantage of 300 cavalry to only 120 for Morgan and the Patriots. In spite of being a horseman himself, Tarleton failed to capitalize on his position and turned advantage to disadvantage as William Washington prevailed in each succeeding cavalry clash of the battle.
Mackenzie referred to his last point of error as “the most destructive” of all Tarleton’s blunders. He failed to see the developing problem in his center and didn’t call up the reserve cavalry until too late in the battle.[v] To make things worse, many of these reserves were rebel turncoats recruited after Camden, all of whom had experienced defeat only seven weeks earlier at Blackstocks Plantation. By the time Tarleton finally called them to join the battle, not only were the infantry already long in trouble, but the reserves had just watched Washington defeat both the 17th and Ogilvie’s troop in succession. They no longer had the nerve to join the battle and refused Tarleton’s order to sacrifice themselves.
All things considered, the Battle of Cowpens was fought between relatively equal forces on open ground. Had Lt. Colonel Tarleton fought his cavalry as a single unit or shown some restraint early on, the disastrous result might have been reversed.
Position 2: Jim Piecuch – Tarleton 25% (Cornwallis, Morgan and Howard 75%)
As commander of the British detachment at Cowpens, Banastre Tarleton bears responsibility for the defeat. However, that responsibility is shared with his commander, Lt. Gen. Charles, Earl Cornwallis. Despite Cornwallis’s failures and the fact that Tarleton faced a numerically superior enemy that was fighting on terrain chosen for its favorability to the defense, Tarleton would have won a victory if not for a misunderstood American order that Brig. Gen. Daniel Morgan and Lt. Col. John Eager Howard turned to their advantage.
When Nathanael Greene divided his army, he wrote that the move “compels my adversary to divide his” own force.[vi] Nevertheless, Cornwallis did not have to divide his army in response; doing so played into Greene’s hands and gave the Americans an opportunity to defeat the larger British army in detail. After one of his detachments had been annihilated at Kings Mountain the previous October, Cornwallis knew the risks of dividing his force. Once he had detached Tarleton, Cornwallis failed to cooperate with him. Although Tarleton informed Cornwallis of his intended movements and requested that the main British army move in concert with him to trap Morgan, Cornwallis failed to march and sent no messages to Tarleton after January 14.[vii]

When Tarleton encountered Morgan on the morning of January 17, he had reason to believe that Cornwallis was approaching the American rear. This may have encouraged him to attack quickly, along with his desire to defeat Morgan before the Americans could escape across Broad River. As Tarleton observed, “the situation of the enemy was desperate in case of misfortune; an open country, and a river in their rear, must have thrown them entirely into the power” of his “superior cavalry.” In addition, Tarleton believed that if his troops were defeated, Cornwallis was nearby to prevent disaster.[viii]
Tarleton learned the nature of the ground from local loyalists, his own observations, and a captured American militia officer. Tarleton also learned that Morgan commanded over 1800 men. While this estimate has been ridiculed as an exaggeration by Tarleton, a study of American pension records by Lawrence Babits has shown that Morgan’s force numbered between 1800 and 2400 men. Thus the Americans had a numerical advantage of between 700 and 1200 men.[ix] Perhaps this should have made Tarleton hesitate, but the British army had triumphed against similar odds at Camden on August 16, 1780. There was no reason for Tarleton to doubt that his British regulars could again defeat a larger force.
Tarleton was forced to make a frontal assault. The American position, and the ground where Tarleton deployed the British troops, was narrowed by ravines and streams to such an extent that Tarleton could not even deploy all of his infantry in line of battle. He therefore held the battalion of the 71st Regiment in reserve until the field widened, and when he finally had the opportunity, Tarleton used the 71st to conduct a flank attack. Tarleton could have rested his men before attacking, but he could not know whether Morgan might take advantage of the delay to withdraw across Broad River.[x]
As for using his artillery for a preparatory bombardment, the two British three-pounders were not suitable for such a task. Artillery rarely played a decisive role in Revolutionary battles. Tarleton’s two light guns would have had little effect on the Americans. As Babits notes, the three-pounders “had a point-blank range of 180 yards,” and artillery used to support attacks was “generally positioned about 100 yards from the enemy.” At that distance, the crews would have been well within range of Morgan’s riflemen and may have suffered more losses than they inflicted.[xi]
Tarleton’s assault succeeded, driving back both lines of American militia despite the British taking some losses. Tarleton could have committed more of his cavalry to pursue the fugitives, but only at the expense of weakening his reserve. His tactics brought the British to the verge of victory as they approached the final American line and Tarleton ordered the 71st to attack the American right flank. Howard, commanding the Americans there, ordered his two rightmost companies to reform at a right angle to the main line. Had the order been obeyed, it is unlikely that two companies could have withstood the attack of a veteran British battalion. However, Howard’s order was misunderstood and the troops thought they had been instructed to withdraw. When they did so, the British soldiers broke ranks to pursue what they believed was a fleeing enemy, and thus lost the cohesion necessary to fight effectively. Morgan and Howard took advantage of the circumstance and turned the troops around to fire a volley, followed by a bayonet charge that the disorganized British could not withstand. It is an excellent example of luck in battle, along with the skill of Howard and Morgan who took prompt advantage of the situation.[xii]
Rebuttal: Wayne Lynch
On the morning of the battle, Tarleton forced a march of several miles in order to catch up with Morgan and the Patriots. Once found to be displayed on good defensive ground with back to the river, Tarleton should have immediately realized the bad position Morgan was actually caught in. Unable to retreat and faced with the most maneuverable part of the British army (light troops and the Legion), Morgan set himself for an immediate frontal assault. And, very predictably, Tarleton obliged.
Further, Tarleton actually had no reasonable basis to conclude that Cornwallis was arriving at Cowpens that morning. Cornwallis sent reports of his delayed moves on the 8th, 9th, 10th, 11th, 14th, and 16th. Tarleton was actually well informed that rain had held up Leslie with the reinforcements that Cornwallis had been waiting for.[xiii] Additionally, Cornwallis didn’t have access to any cavalry or fast moving light troops. Tarleton’s attempt to shift blame to Lord Cornwallis fails to consider that Banastre already possessed those capabilities leaving Cornwallis with the slow moving infantry and baggage trains.
[i] Cornwallis to Tarleton, January 30, 1780, reprinted in Tarleton, Banastre, A History of the Campaigns of 1780 and 1781 (Dublin, 1787), p. 258
[ii] Mackenzie, Roderick, Strictures on Lt. Col. Tarleton’s History “of the Campaigns of 1780 and 1781” (London, 1787), p. 107-110
[vi] Greene to Unidentified Person, Jan. 1-23, 1781, in Richard K. Showman, ed., The Papers of General Nathanael Greene, Vol. 7 (Chapel Hill: University of North Carolina Press, 1994), 175.
[vii] Banastre Tarleton, A History of the Campaigns of 1780 and 1781, in the Southern Provinces of North America (London: T. Cadell, 1787), 219-220.
[ix] Lawrence E. Babits, A Devil of a Whipping: The Battle of Cowpens (Chapel Hill: University of North Carolina Press, 1998), 47, 56, 150.




8 Comments
Amicus Brief:
Cowpens is a good example of the kind of history that lends credence to Erikson’s Young Man Luther (i.e, the psychoanalysis of history) applied to opposing commanders. Tarleton was in the middle of seven children, was somewhat of a profligate and was heading for, what else, a lawyer, when war broke out. He was impetuous, courageous and tough. Morgan was a tough, confident and self-made man. My view is that Tarleton ruled from fear, Morgan from strong leadership. The latter also had a real chip on his shoulder about the King’s army. Morgan chose the ground, a point not well covered in the article and knew his soldiers well. He used Tarleton’s weakness against him. The other aspect true in all battles is the Moment of Truth. In 18th C warfare, the slightest turn of events can change circumstances irrevocably and disastrously. A charismatic leader like Morgan can be the difference between victory and defeat. Both Morgan and Tarleton knew their men well but tactical mistakes on the latter’s part and the planning undertaken by Morgan turned the tide. One could claim luck on Morgan’s part but causing nearly 90 percent killed and captured Brits speaks for itself. Assessing blame is another American pastime. How Morgan and Tarleton have been treated regarding the Cowpens reminds me of how corporate CEOs are evaluated: Big financial bonuses for success, resignation/firing for failure. But like battlefield CEOs, it’s really the fighting unit that makes or breaks the boss, despite a lack of recognition. So, playing the blame game, I’d have to allocate responsibility for failure 100% to Tarleton. But victory can be allocated 75% to Morgan, 25% to his men.
Interesting comments, thanks. Do you (or anyone) have any particular opinions on the cavalry operations in the battle?
I think Tarleton and his dragoons made several blunders that were replicated in such cavalry actions as Waterloo and the Crimea. Cavalry were the elite of military action in the 18th C but unless used wisely, there could be disastrous results. At Cowpens, Tarleton ordered his light dragoons to immediately charge the rebel lines, without infantry support. The result was a failure that staggered Tarleton. Had Tarleton taken the time to assess the strength and formations of the rebels, acknowledging the rebels had a possible cavalry support of his own, he might have rested his men, started with an infantry advance and used his light cavalry to break the rebels hard on the effect of the infantry. Instead, the infantry watched as many chargers fell dead. This would hardly instill the foot soldiers with confidence in their subsequent attack, knowing that Tarleton’s illustrious mounted unit was now tattered. As to Washington, his unit was effectively used as a counter-attacking unit in a classic use of cavalry. But he was as impetuous as Tarleton, singly charging beyond the support of his own men. The effect of Tarleton’s initial charge had far less impact than hoped for. Being ignorant of the forces arrayed against him and the rebels’ positioning was error #1. Failing to use infantry in close support was error #2. Refusing to consider the morale and fatigue of his unit was error #3. Add to the foregoing an inappropriate use of dragoons (heavy cavalry might have been more useful had he had such units), a failure to anticipate a cavalry counter-attack and an inability to use his ‘leadership’ skills in preventing the rout, you have a bad day for Ban.
Thanks for this fascinating discussion!
I am a huge fan of the battle of Cowpens and have made an effort to make the Anniversary celebration the last two years. Between Wayne and Jim’s post and Stephen’s comments, this was a very thorough and excellent discussion on the topic.
For those of you who have never been to Cowpens I recommend checking out the Anniversary Celebration in February. Can’t wait till my boys are old enough to join me!
I recorded an excellent summary of the battle by reenactor Bert Pucket here.
http://twistification.com/cowpens/
Also check out the videos for the cavalry and artillery! Enjoy! Again thanks for the excellent post.
The reason for the defeat has its roots in the way the British operated in the war. They almost always used extended files and loose formation in battle which is exactly what Tarleton blamed his defeat on,
“the loose manner of forming which has always been practised by the King’s troops in America”.
The reason they had not been caught out before is because the Americans had always met them with one or two lines deep, so were easily routed like at Camden. Morgan set his army out three lines deep.
Because British armies in the south were so small they had to fight in extended line, which meant Tarleton had no reserve to cover if any part of his army faltered, when the 71st broke, his entire line collapsed.
The same fate almost befell Cornwallis when he engaged an even larger army under the command of Greene at Guilford Courthouse. Greene copied the tactic of three line deep defence employed by Morgan, but Cornwallis cleverly used his artillery to support his faltering line, although the battle cost him the best part of his army.